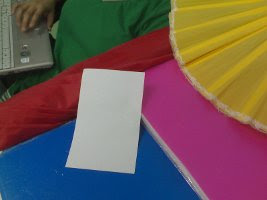
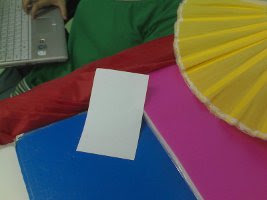
In this activity, the digital camera of a Sony Ericsson phone was used to take pictures of objects using the different White Balancing Options which are bulb, cloudy, daylight, and fluorescent. Figure 1 below shows the images captured.


Figure 1. Different white balancing settings for differently colored objects (left) and objects of the same hue (right) like objects that have the color green. The white balancing settings are (top to bottom) bulb, cloudy, daylight, and fluorescent.
From the images obtained, it is observed that the bulb and fluorescent settings produced bluish images although the bulb setting images are more bluish and the fluorescent setting images are dimmer, while the cloudy setting produced images with slightly yellowish images and the daylight setting produced brighter colors and less yellowish images than the cloudy setting.
Now we apply two different White Balancing algorithms to these images namely the White Patch Algorithm and the Gray World Algorithm. The White Patch Algorithm is done by dividing the RGB channels of the original image by the RGB value of the white patch in the original image. Figure 2 shows the white patches used for each image in Figure 1 respectively and Figure 3 shows the resulting images after the White Patch Algorithm.
As observed from the first row of images in Figure 3 it seemed that the white balancing went wrong. By examining the RGB channels (see Figure 4) of the original image of one of the wrongly white balanced images we see that there are areas in the image where the R values are very small and this includes the white patch used for the White Patch Algorithm. Performing the balancing on the red channel will result to very high values for the areas having high red values and very low values for the areas with very low red values thus resulting to the first row of images in Figure 3. It can also be noted that these images were captured with the White Balance setting turned to 'Bulb' which may be the source of error for the resulting image.


Figure 4. Respective R, G, and B channels of the original image for the resulting image (first row) in Figure 3.
Now we examine the second white balancing algorithm which is the Gray World Algorithm. In this algorithm the balancing constant is based on all the respective RGB values of the image and not just a white patch in the image. Figure 5 shows the resulting white balanced images of the original images in Figure 1.
From the obtained white balanced images, we can see that the White Patch Algorithm gives better results but has a disadvantage when the RGB values of the original image has extreme values that could be very low or very high for particular areas. The Gray World Algorithm did not give a good white balancing result because it depends on the most dominant color on the image although extreme RGB values is not a problem with it.
I give myself a 9 for this activity since I was able to implement correctly the two white balancing algorithms and was able to identify possible sources of error, although I was not able to adjust the unsatisfactory results obtained for the images with 'Bulb' white balance setting.
I thank Kaye Vergel for lending me her Sony Ericsson phone with digital camera, Gilbert Gubatan for the red umbrella, Cherry Palomero for the pink clear folder and yellow hand fan, Luis Buno for the blue logbook, Shamandura Cabato for modeling her green shirt, Winsome Rara for the green eyeglass case, Jica Monsanto for the green box and the white piece of paper, NIP for the green floor paint and green colored chalk, and lastly Miguel Sison for the comments and recommendations on the unsatisfatory results for the white balancing of the images with 'Bulb' white balance setting.


This report deserves a 10.
ReplyDelete